
Painting your car following a full restoration is one of the most exciting parts of the project. After all, this is where you get to flex your creativity and make your ride look exactly how you want. However, not all DIY paint jobs turn out how we imagine they will. This is especially the case if it’s your first time taking on one of these projects. As such, you must do a few essential actions throughout the process. These are some important steps for painting your car during a restoration.
Prepare and Repair Your Car Frame
To ensure you get a smooth, flawless finish on your car, you must first take the time to repair any previous damage. Dents, scratches, and scuffs will all show through your paint and reduce the vehicle’s attractiveness. Therefore, starting the process by filling these areas and smoothing them out is always worthwhile. You’ll want to prepare the rest of the frame as well by sanding away any rust and buffing out sharp edges. This will ensure that the paint properly adheres to the surface and leaves that sleek look you’re after.
Apply a Priming Product
Once you finish your preparations, apply a specialized automotive paint primer to the car frame. Primer creates a layer between the metal car body and the paint you’re looking to use. After this material dries, it improves the success rate of your paint adhesion and creates a much more consistent appearance after the fact. Even if you opt out of priming your entire car, you should always prime over areas you’ve filled or fixed to promote better coverage.
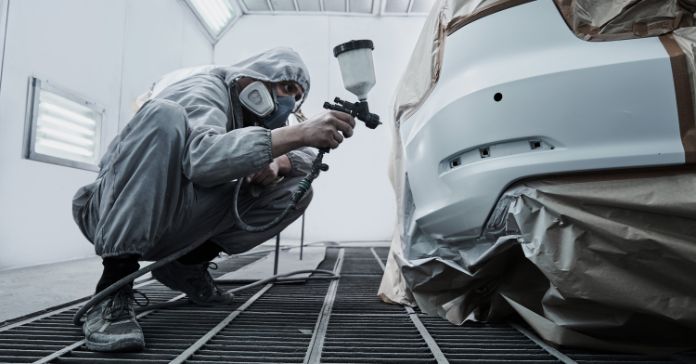
Evenly Coat the Car With Quality Paint
Then, when your primer dries, you’re ready to start painting your car. Make sure to acquire a quality paint product designed to work on vehicles. Otherwise, you risk it not sticking to the metal correctly. You’ll want to thin the paint as well so that it can run through your spray gun without clogging the system. Additionally, always follow the manufacturer’s instructions for application and spray in even layers. This is how you’ll achieve the best possible results.
Finish With a Durable Clear Coat
There’s one more important step to remember for painting your car during a restoration. Clear coats are essential for protecting your paint and locking in that beautiful color. These transparent, hardened barriers can even help keep your car safe from scratches and weather hazards. Properly apply your clear coat by spraying it evenly over the top of your dried paint. You may need to use multiple coats to achieve the desired thickness, but you should take extra care not to overapply it.
With all the work you put into your car restoration, it’s only natural that you’d want it to look its very best. Following these key steps will improve your results and protect your car’s appearance in the future. This way, it can be a ride you’re proud to show off for years.